まえがき
MCPサーバーを Claude for Desktop で利用する方法について解説します。
以下の公式ドキュメントに記載されているWindows 上で Python を使用した例を元に説明します。
Quickstart - For Server Developers
2025年3月15日時点では、Claude for Desktop から MCP サーバーの機能は 無料プラン でも利用できます。(Proを契約しなくてもOK)
0.使用するツールをインストール
まずは下記ツールをインストールします。
- git
- Visual Studio Code(VSCode)
- Claude for Desktop
0-1.gitをインストール
powershellを起動し下記コマンドでgitをインストールします。
winget install Git.Git
インストール後、下記コマンドでユーザースコープの環境変数のPathにフォルダを追加します。
$path = [System.Environment]::GetEnvironmentVariable("Path", "User")
$newPath = "$path;C:\Program Files\Git\cmd"
[System.Environment]::SetEnvironmentVariable("Path", $newPath, "User")
powershellを再起動し、gitコマンドが使えることを確認してください。
git version
0-2.VSCodeをインストール
下記公式HPにアクセス後、「Download for Windows」ボタンを押下しVSCodeをインストールします。
Visual Studio Code
インストーラーに従ってインストールをしてください。特に迷うことは無いと思います。
0-3.Claude for Desktopをインストール
下記公式HPにアクセス後、「Windows」ボタンを押下しClaude for Desktopをインストールします。
Claude
インストーラーに従ってインストールをしてください。こちらも特に迷うことは無いと思います。
1.uvを使用してpythonプロジェクトの環境を作成
1ー1.uvをインストール
下記コマンドを実行してuvをインストールします。
powershell -ExecutionPolicy ByPass -c "irm https://astral.sh/uv/install.ps1 | iex"
1-2.weatherプロジェクトを作成
下記コマンドを実行してweatherプロジェクトを作成し、weatherフォルダに移動します。
uv init weather
cd weather
仮想環境を作成してアクティベートします。
uv venv
.venv\Scripts\activate
mcp[cli]とhttpxパッケージをインストールします。
uv add mcp[cli] httpx
weather.pyファイルを作成します。
new-item weather.py
1-3.サーバーのコードを書く
下記コードを先ほど作成したweather.pyに貼り付けます。
from typing import Any
import httpx
from mcp.server.fastmcp import FastMCP

# Initialize FastMCP server
mcp = FastMCP("weather")

# Constants
NWS_API_BASE = "https://api.weather.gov"
USER_AGENT = "weather-app/1.0"

async def make_nws_request(url: str) -> dict[str, Any] | None:
    """Make a request to the NWS API with proper error handling."""
    headers = {
        "User-Agent": USER_AGENT,
        "Accept": "application/geo+json"
    }
    async with httpx.AsyncClient() as client:
        try:
            response = await client.get(url, headers=headers, timeout=30.0)
            response.raise_for_status()
            return response.json()
        except Exception:
            return None

def format_alert(feature: dict) -> str:
    """Format an alert feature into a readable string."""
    props = feature["properties"]
    return f"""
Event: {props.get('event', 'Unknown')}
Area: {props.get('areaDesc', 'Unknown')}
Severity: {props.get('severity', 'Unknown')}
Description: {props.get('description', 'No description available')}
Instructions: {props.get('instruction', 'No specific instructions provided')}
"""

@mcp.tool()
async def get_alerts(state: str) -> str:
    """Get weather alerts for a US state.

    Args:
        state: Two-letter US state code (e.g. CA, NY)
    """
    url = f"{NWS_API_BASE}/alerts/active/area/{state}"
    data = await make_nws_request(url)

    if not data or "features" not in data:
        return "Unable to fetch alerts or no alerts found."

    if not data["features"]:
        return "No active alerts for this state."

    alerts = [format_alert(feature) for feature in data["features"]]
    return "\n---\n".join(alerts)

@mcp.tool()
async def get_forecast(latitude: float, longitude: float) -> str:
    """Get weather forecast for a location.

    Args:
        latitude: Latitude of the location
        longitude: Longitude of the location
    """
    # First get the forecast grid endpoint
    points_url = f"{NWS_API_BASE}/points/{latitude},{longitude}"
    points_data = await make_nws_request(points_url)

    if not points_data:
        return "Unable to fetch forecast data for this location."

    # Get the forecast URL from the points response
    forecast_url = points_data["properties"]["forecast"]
    forecast_data = await make_nws_request(forecast_url)

    if not forecast_data:
        return "Unable to fetch detailed forecast."

    # Format the periods into a readable forecast
    periods = forecast_data["properties"]["periods"]
    forecasts = []
    for period in periods[:5]:  # Only show next 5 periods
        forecast = f"""
{period['name']}:
Temperature: {period['temperature']}°{period['temperatureUnit']}
Wind: {period['windSpeed']} {period['windDirection']}
Forecast: {period['detailedForecast']}
"""
        forecasts.append(forecast)

    return "\n---\n".join(forecasts)

if __name__ == "__main__":
    # Initialize and run the server
    mcp.run(transport='stdio')
2.Claude for Desktopの設定と動作確認
2-1.Claude for Desktopの設定ファイルを作成
下記コマンドを実行し、MCPサーバーの設定を記載するファイルを開きます。
code $env:AppData\Claude\claude_desktop_config.json
設定ファイルに下記内容を記載します。
{
    "mcpServers": {
        "weather": {
            "command": "C:\\Users\\{user_name}\\.local\\bin\\uv.exe",
            "args": [
                "--directory",
                "C:\\Users\\{user_name}\\weather",
                "run",
                "weather.py"
            ]
        }
    }
}
{user_name}の箇所やもし別のフォルダにインストールしている場合は適宜変更してください。
(uv.exeの所は公式では"uv"とだけしか記述がなかったですが、恐らくフルパスで指定しないと動かないと思います)
2-2.Claude for Desktopを「開発者モード」にする
Claude for Desktopを起動し、左上の「ハンバーガーメニュー」から「ヘルプ」→「開発者モードを有効にする」を押下します。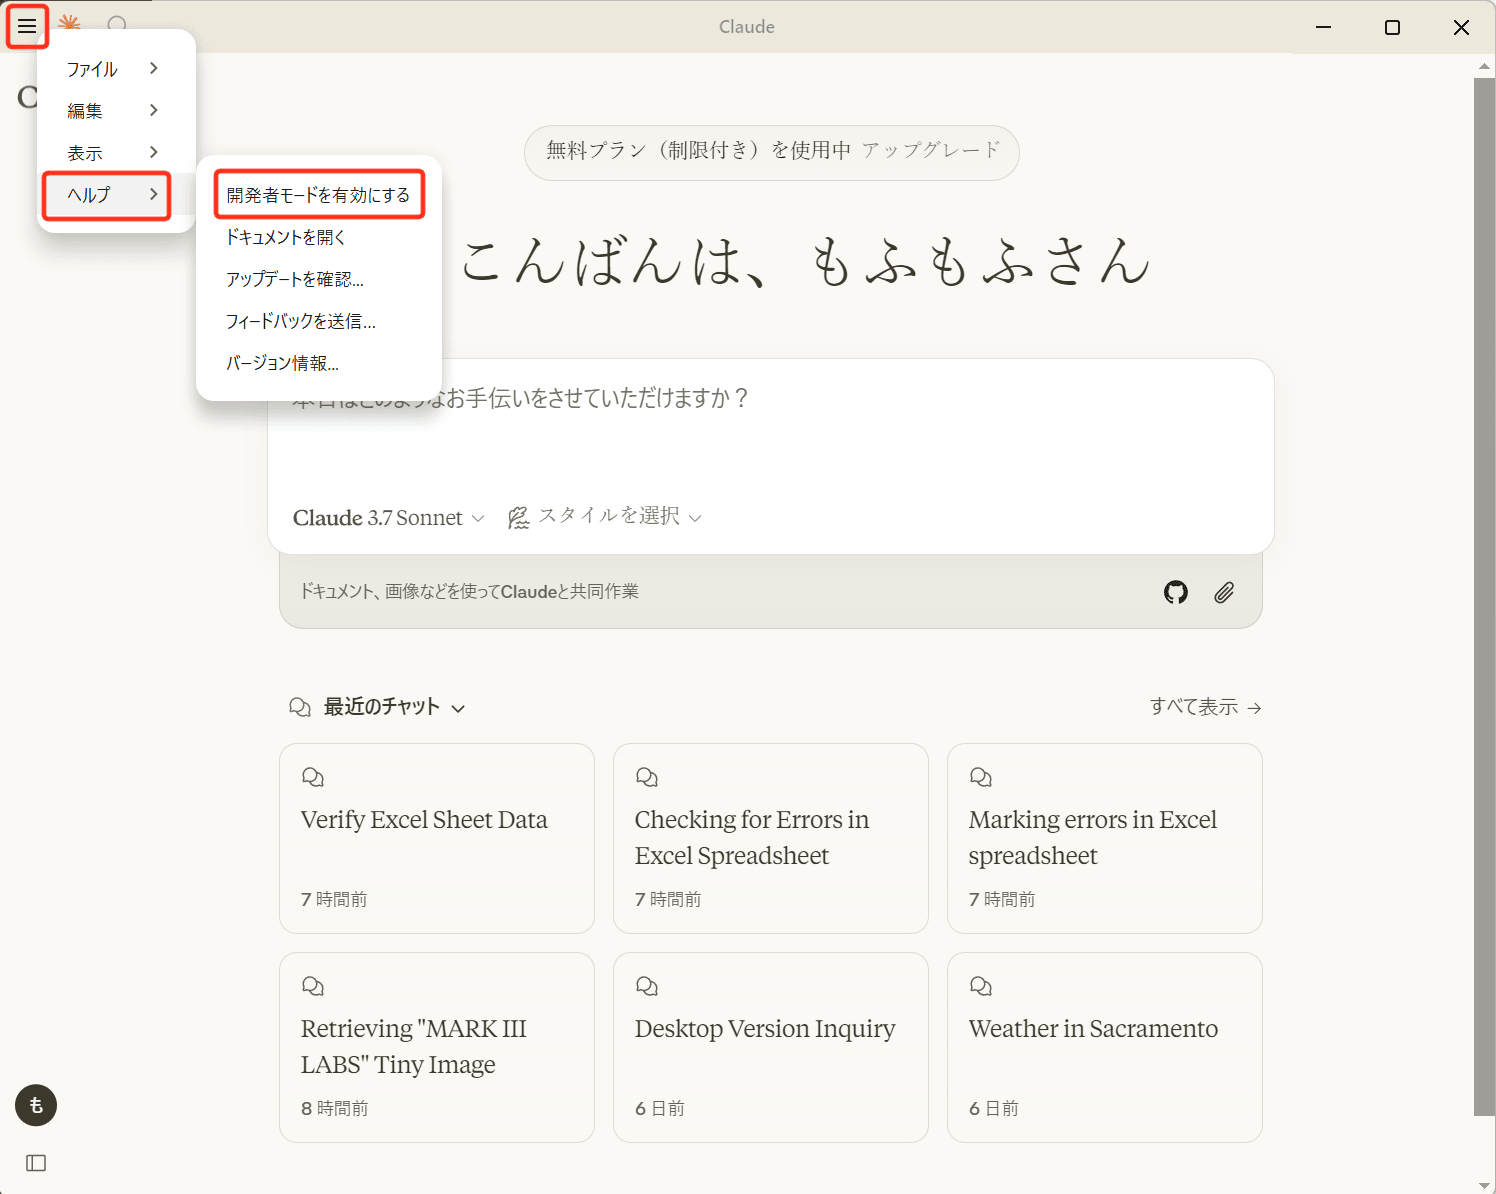
「有効化」を押下します。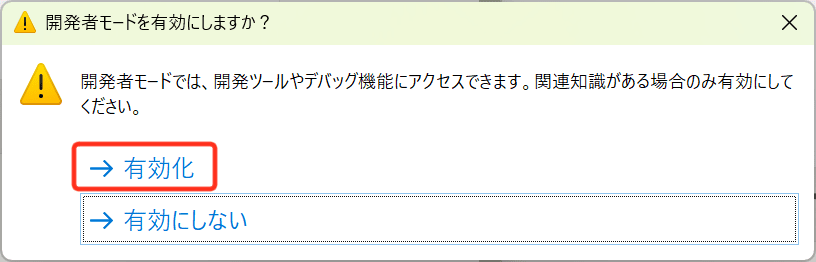
再度左上の「ハンバーガーメニュー」を押下し、「開発者」の欄が追加されていれば「開発者モード」になっています。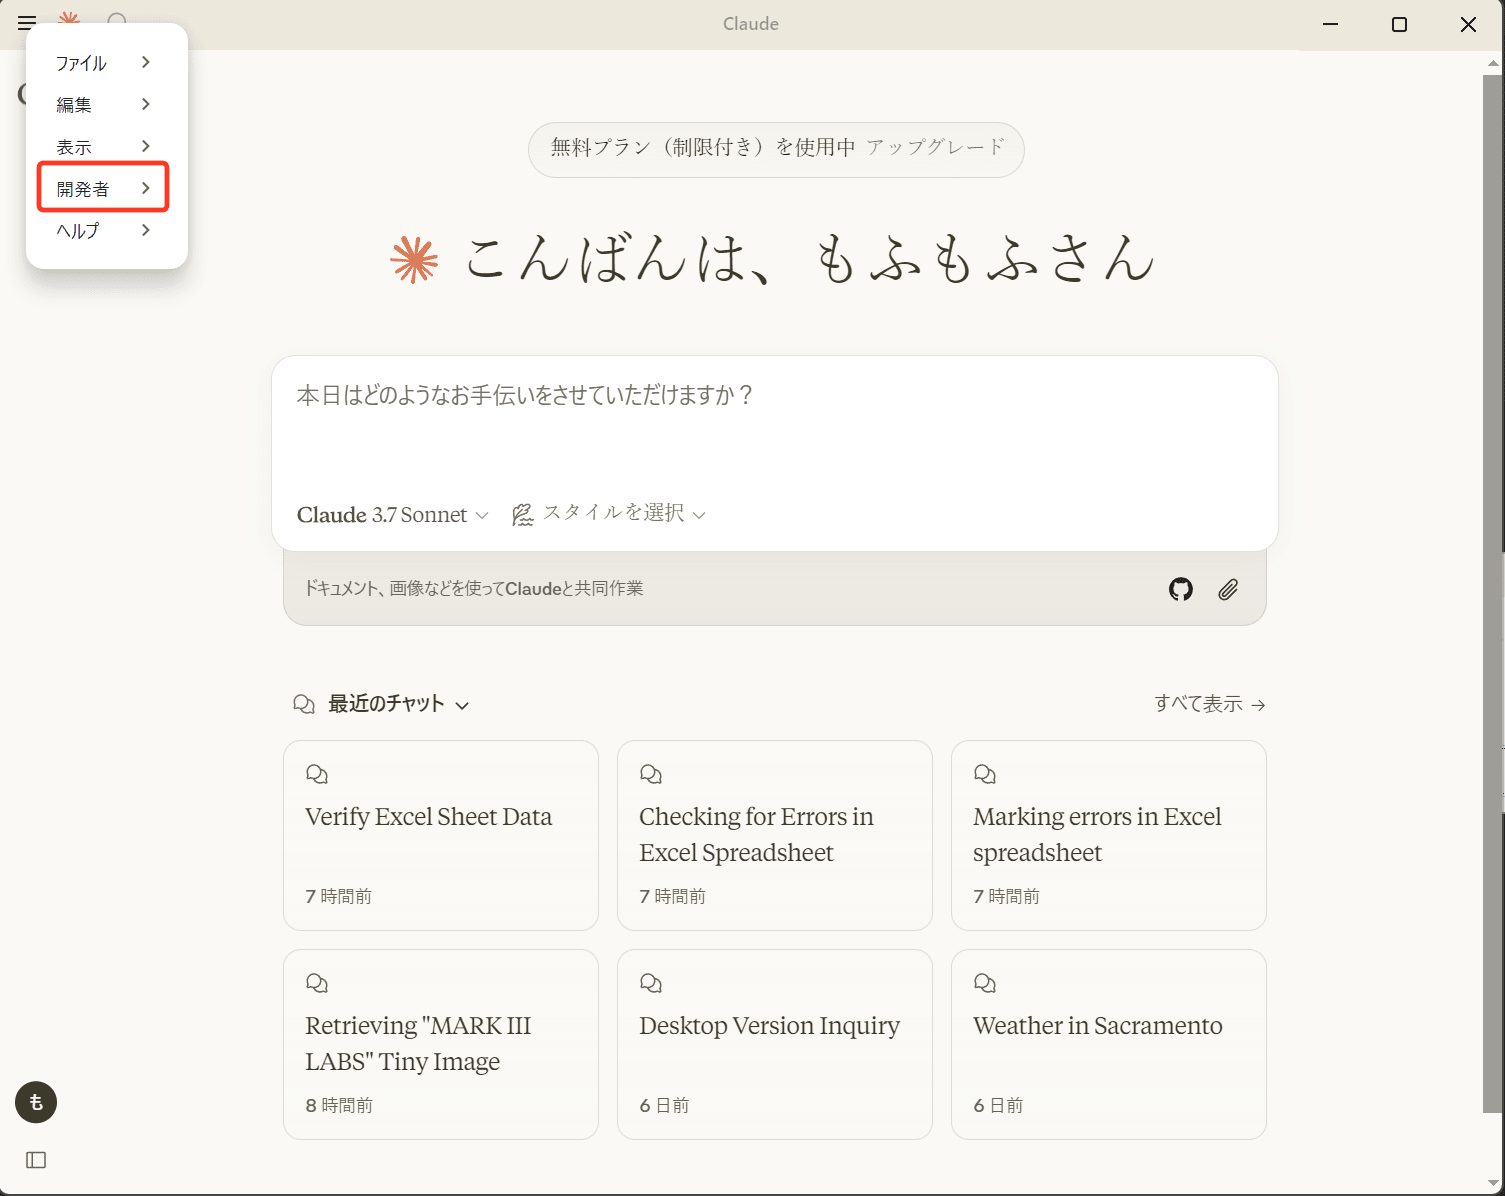
2-3.Claude for Desktopを再起動しMCPサーバーが有効になっていることを確認
Claude for Desktopを起動したときにチャットの右下にトンカチアイコンが表示されていればMCPサーバーが起動され有効になっています。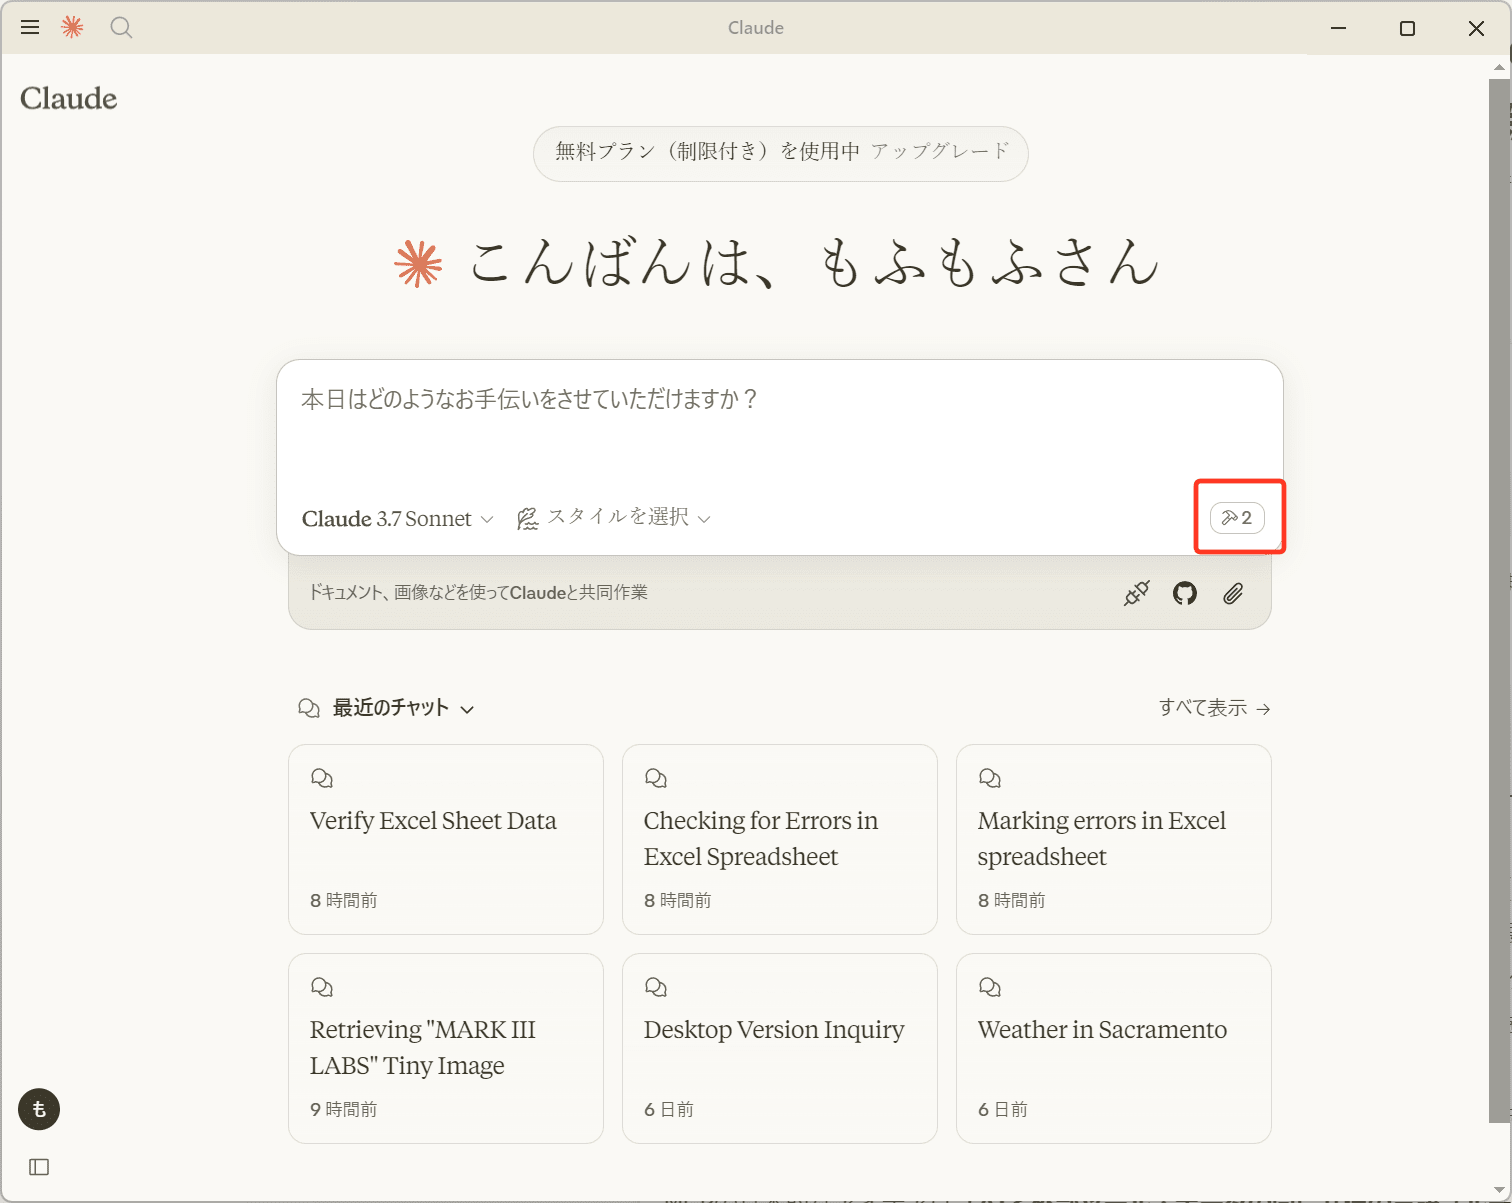
トンカチアイコンを押下すると、現在登録されているMCPサーバーの情報が表示されます。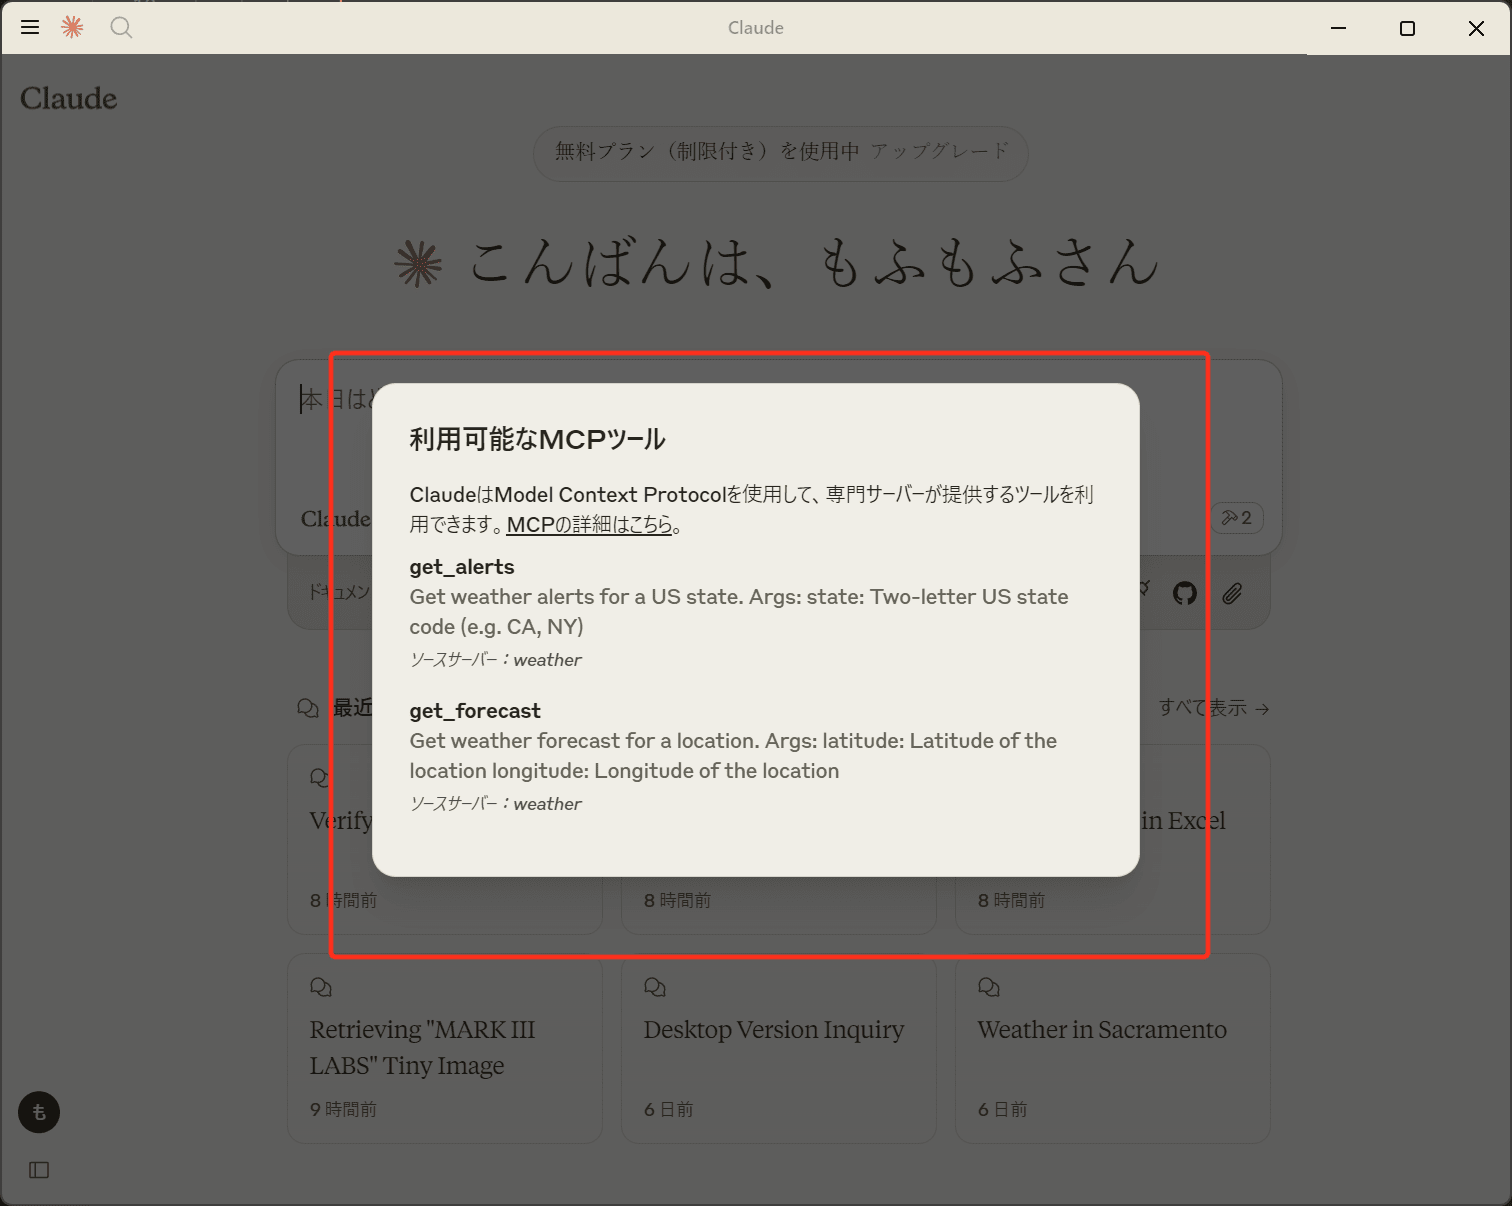
今回登録したツールは「get_alerts」と「get_forecast」ですのでちゃんと読み込まれていますね。
もしトンカチアイコンが表示されていない場合は、Claude for Desktopを再起動する必要があります。
注意点として右上の「×」ボタンを押しても、ウィンドウが消されるだけでプロセスは残っているので、
左上のハンバーガーメニューから「ファイル」→「終了」を選択してください。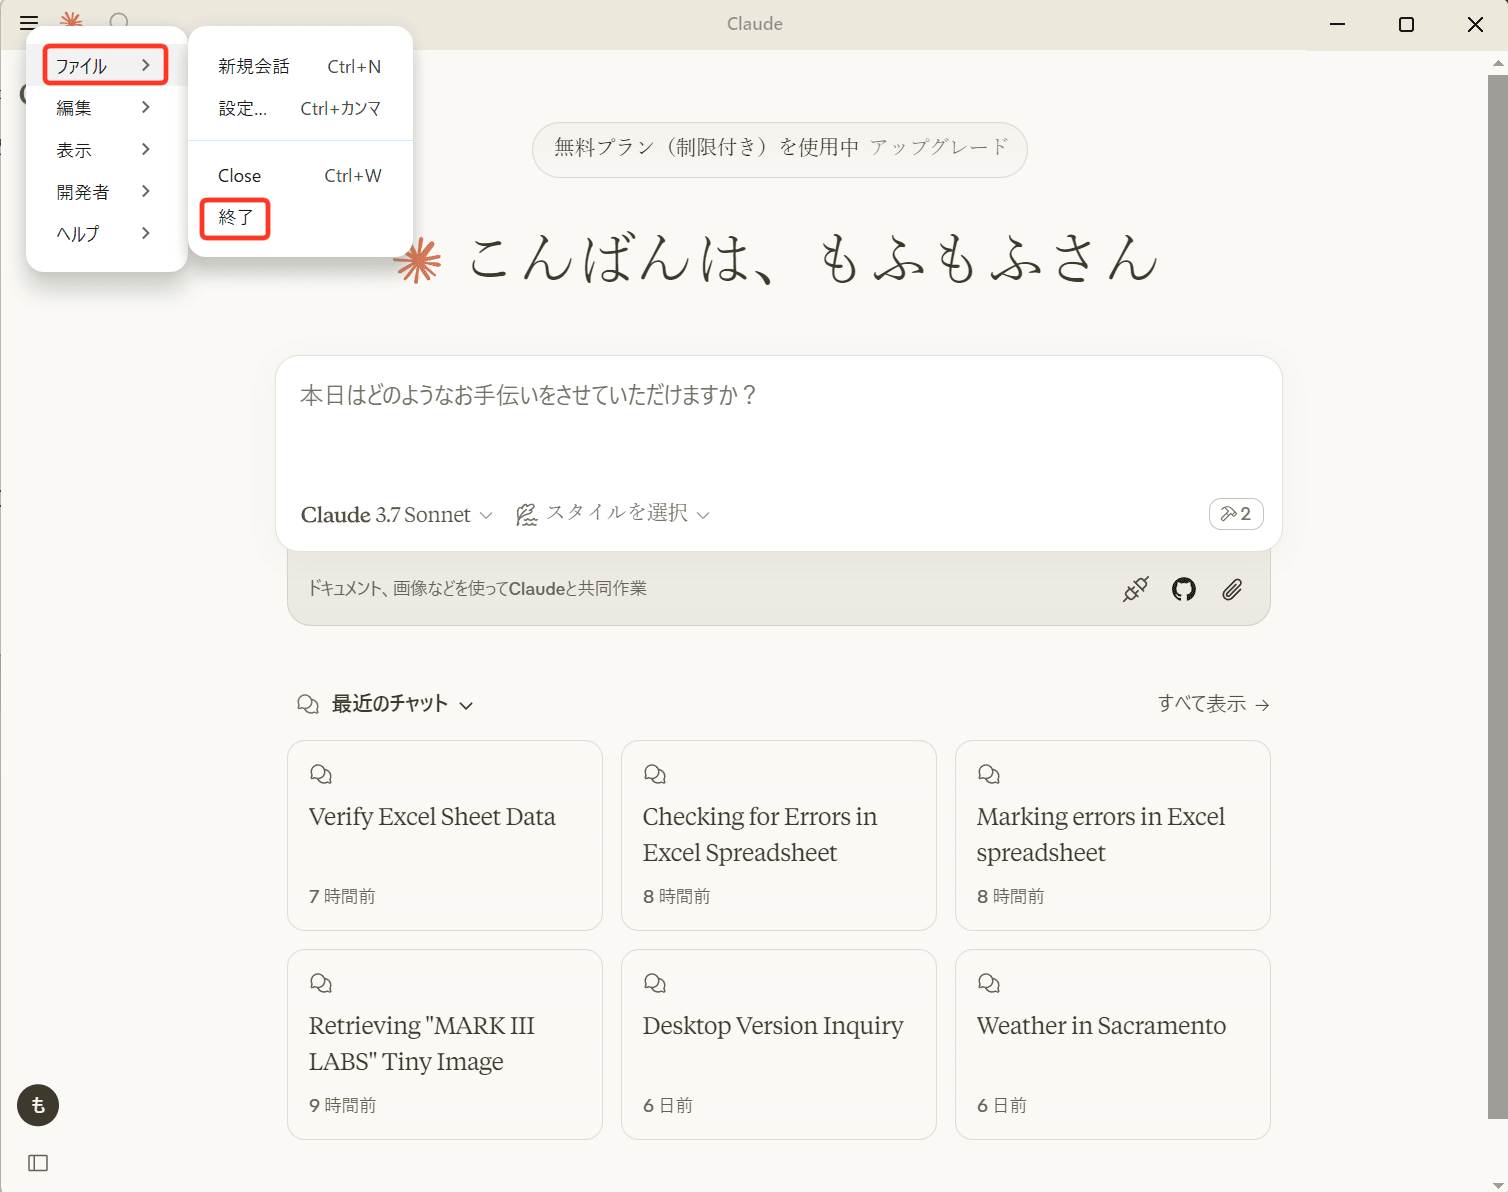
その後、Claude for Desktopを起動すると設定ファイルが再読み込みされて問題なければトンカチアイコンが表示されます。
もしエラーがある場合は下記のようにウィンドウの右上にエラー情報が表示されます。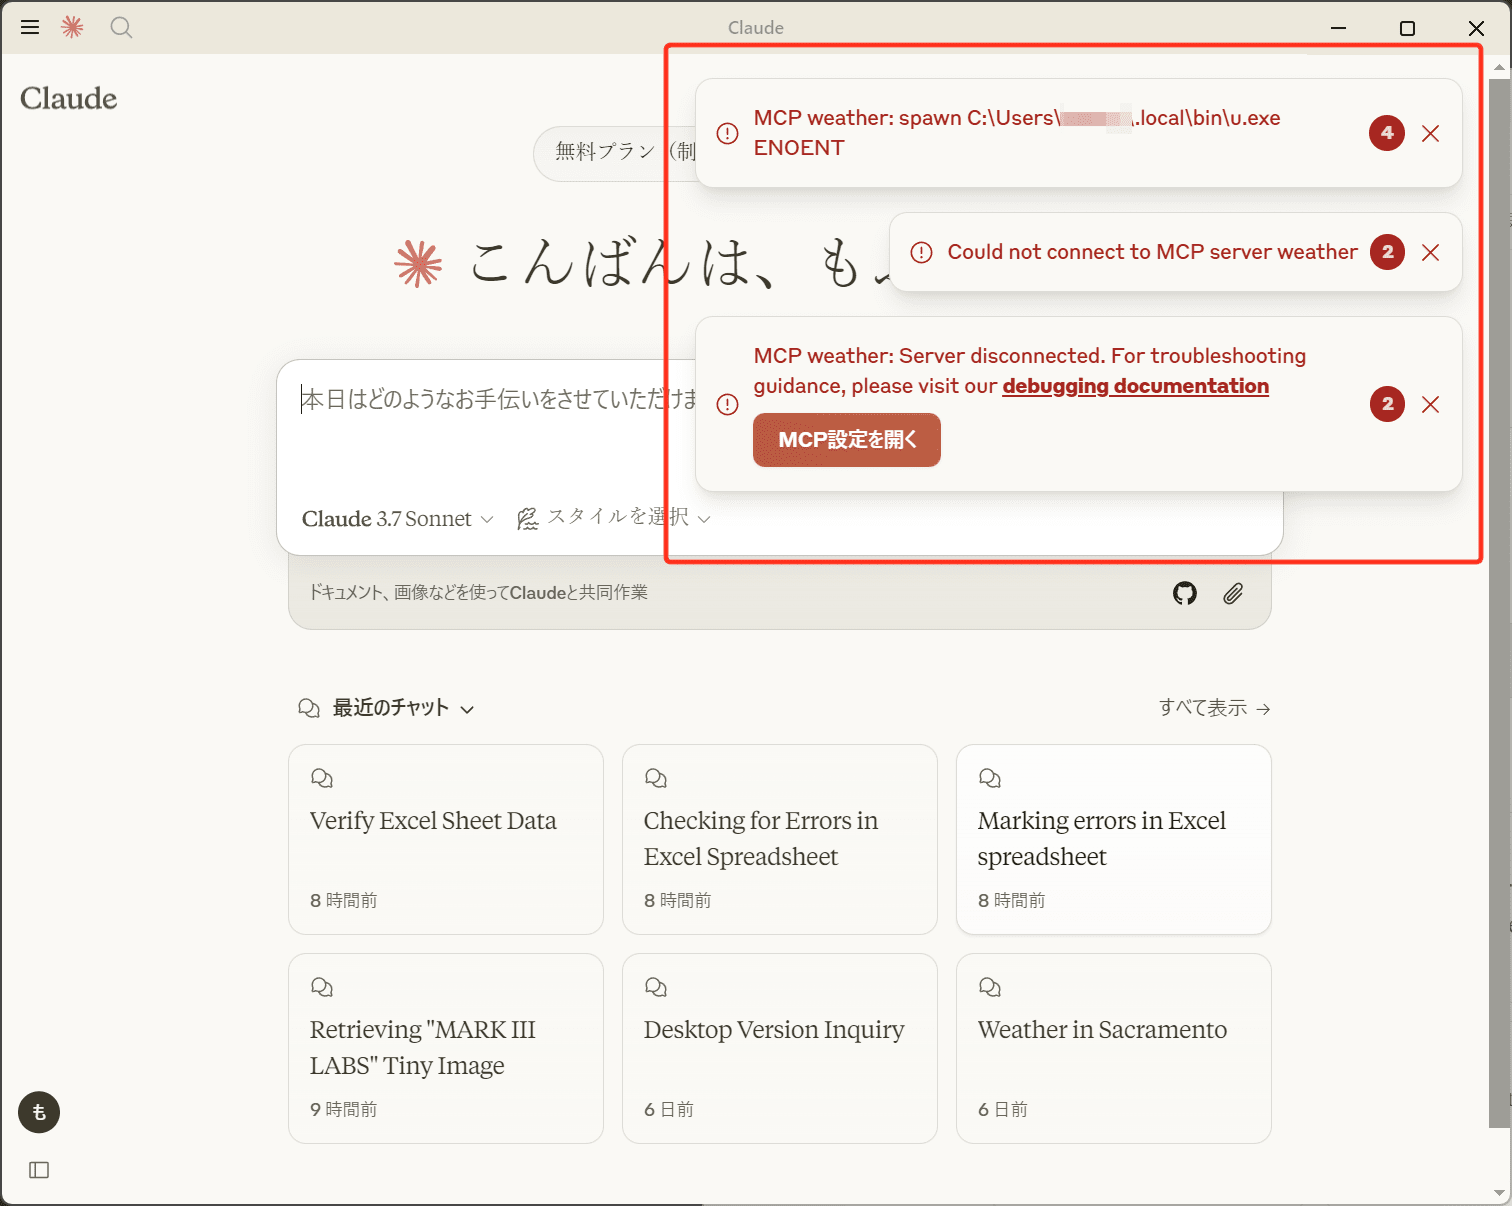
恐らく設定ファイルのディレクトリにミスがある場合がほとんどかと思うので、設定ファイルを確認してみてください。
2-4.MCPサーバーを動かしてみる
トンカチアイコンが表示されMCPサーバーが正常に起動していることを確認できたら、次は実際にClaudeからMCPサーバーにアクセスしてもらいましょう。
今回はアメリカの天気情報を取得するMCPサーバーなので、こちらに問い合わせしてもらうには「What’s the weather in Sacramento?」と入力します。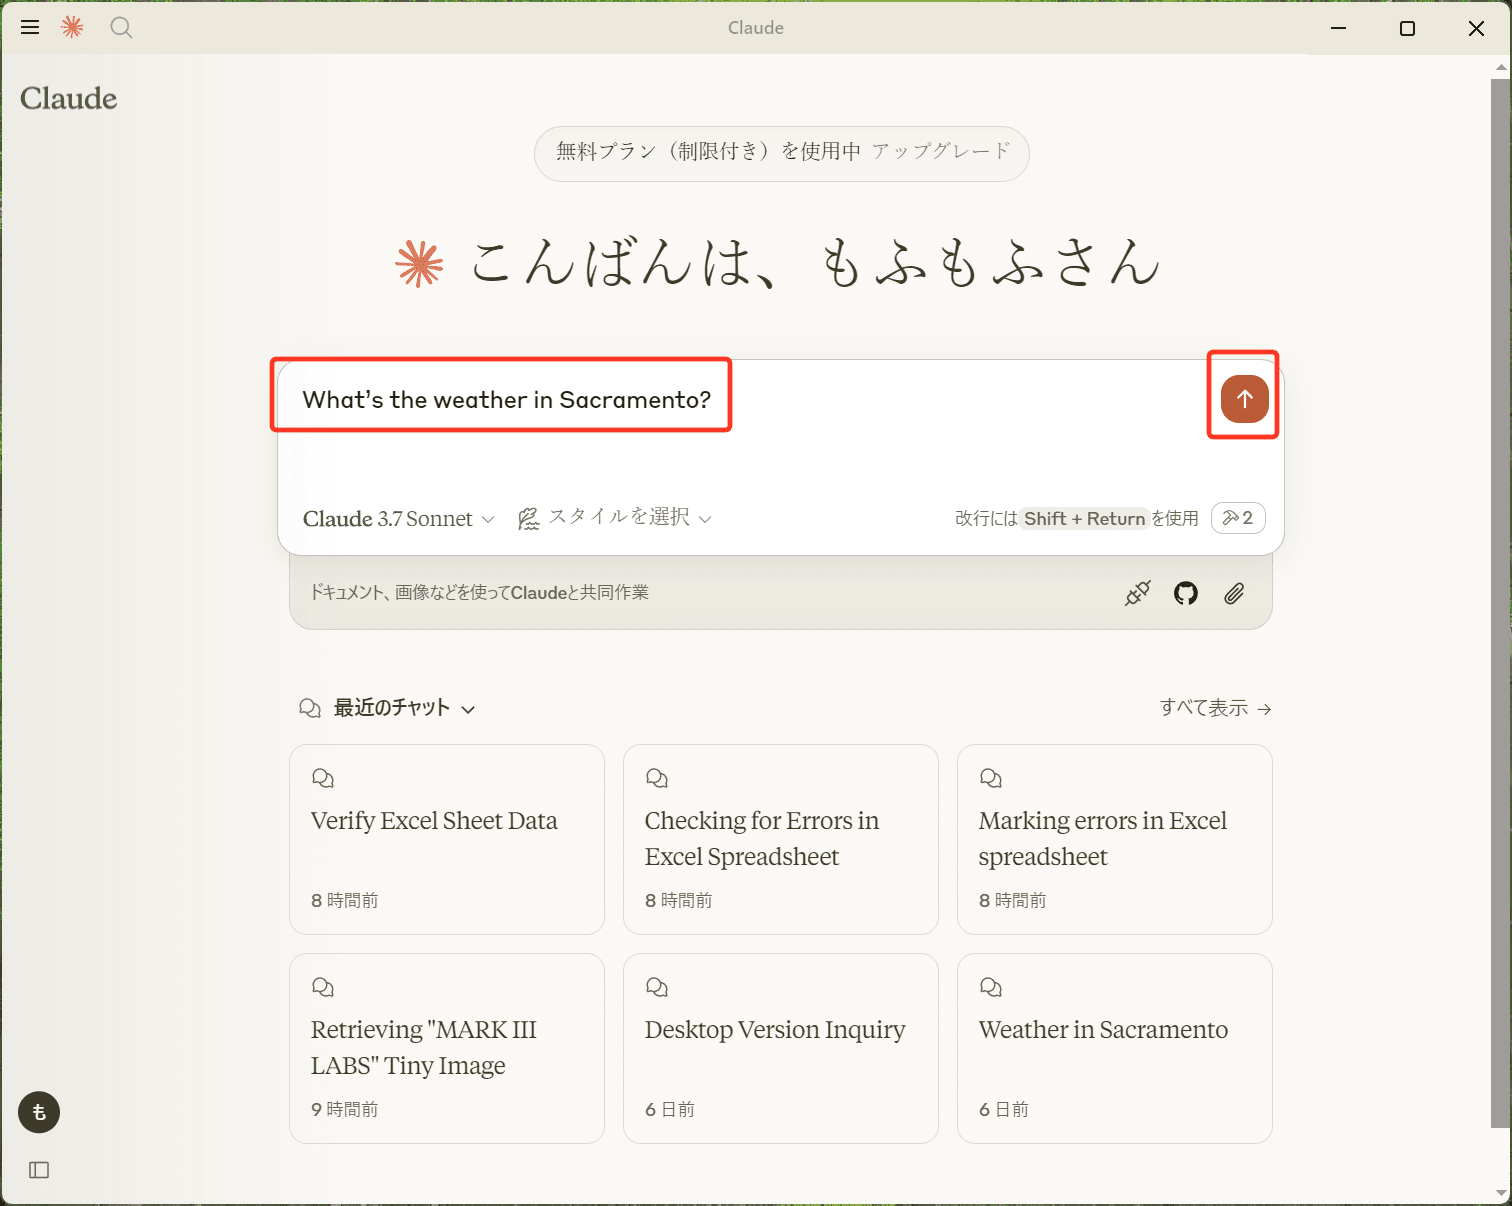
するとClaudeがMCPサーバーのツールを使おうとするので「このチャットで許可」を押下し、実行してもらいます。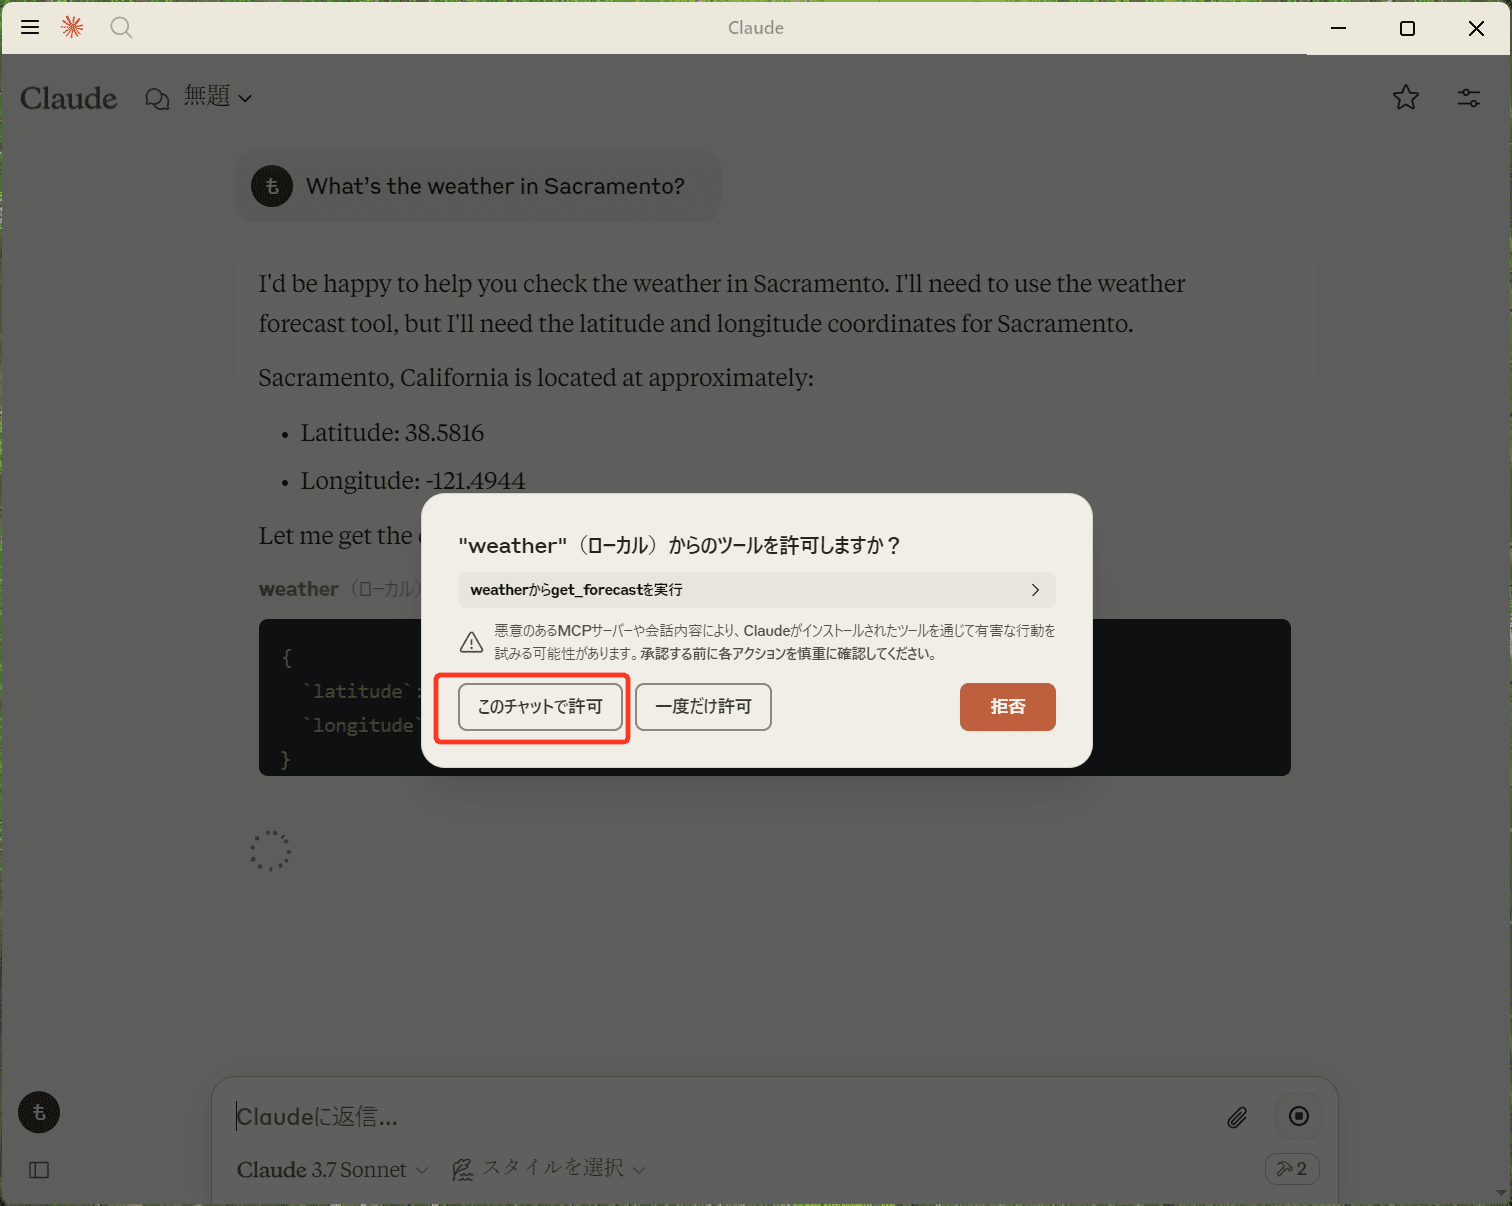
問題なくAPIから情報を取得できたら、サクラメントの天気情報が出力されます。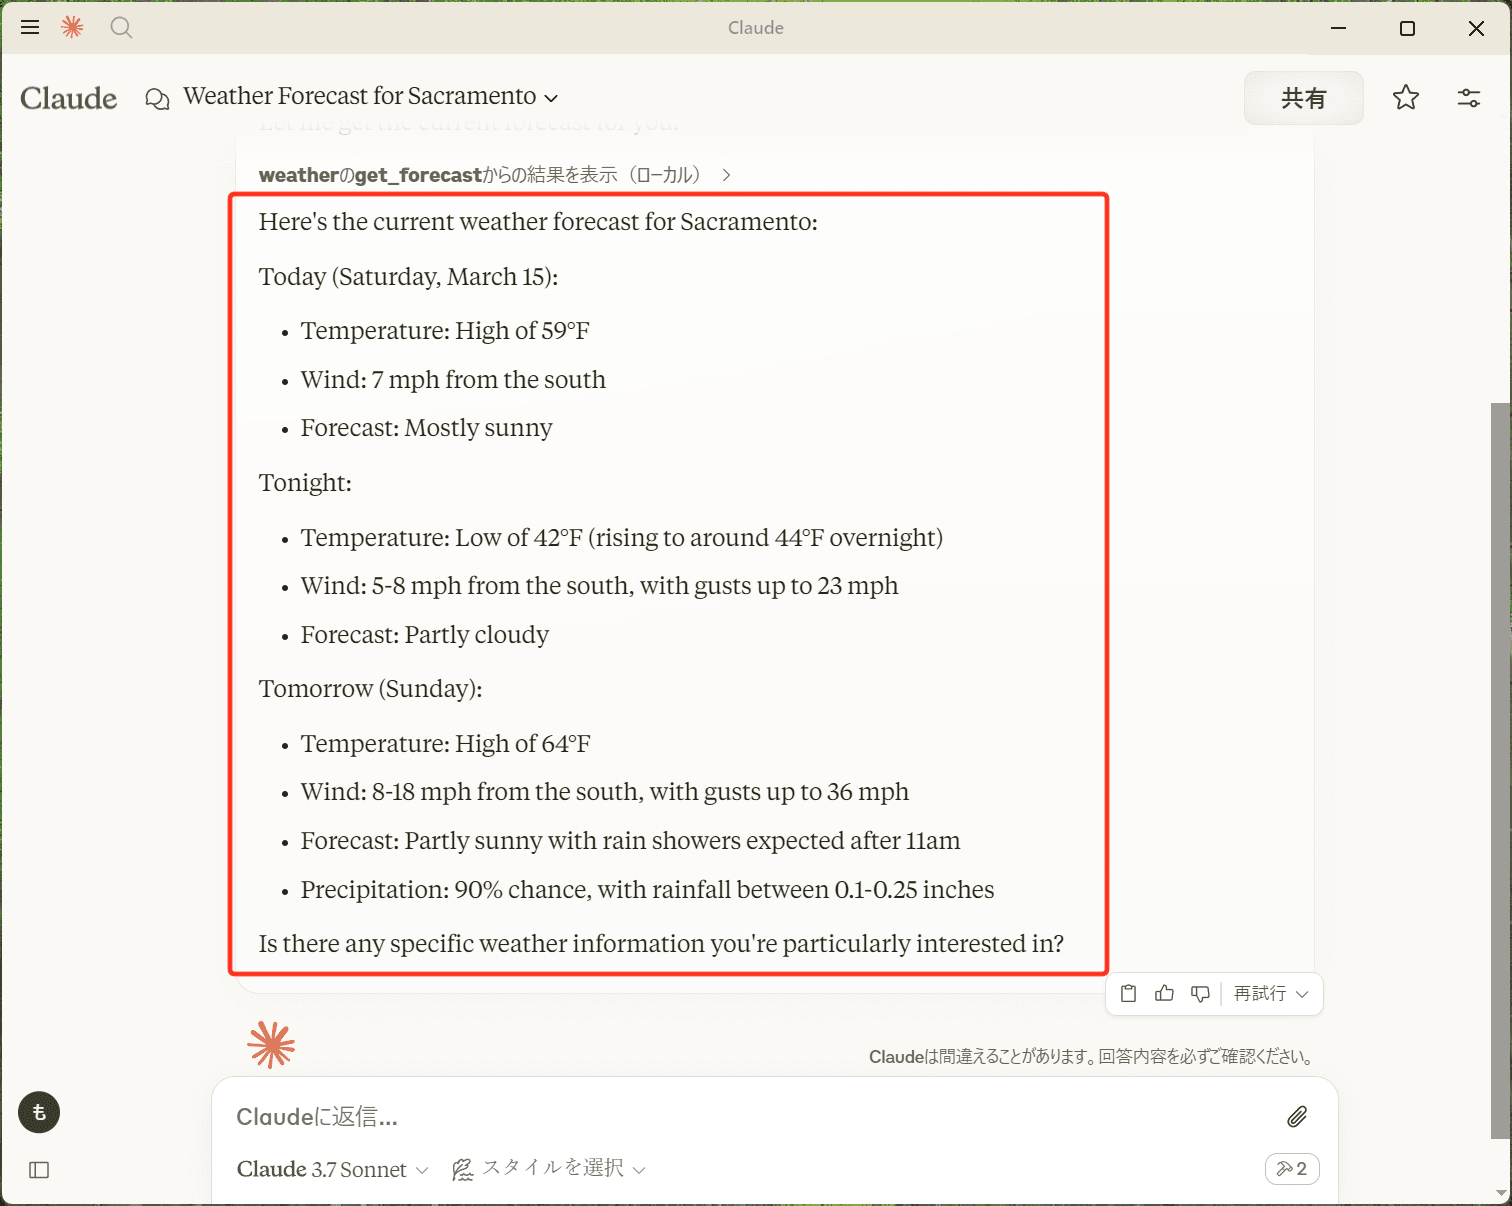
3.どうやって使用するMCPサーバーを判別しているのか?
ClaudeがどのMCPサーバーを使うべきか判断する仕組みは、各サーバーが提供するツール(関数)の冒頭にあるドキュメントコメント(Docstring)に基づいています。
具体的には、サーバーが提供する機能ごとに記載されているドキュメントコメント(下記の例では get_forecast 関数のコメント)が重要です。
@mcp.tool()
def get_forecast(latitude: float, longitude: float) -> str:
    """Get weather forecast for a location.

    Args:
        latitude: Latitude of the location
        longitude: Longitude of the location
    """
Claude for Desktop は、ユーザーのリクエストを処理する際に、このコメント内に書かれた情報(例えば、Get weather forecast for a location. という説明)を読み取り、それに基づいて適切な MCPサーバーの機能を選択します。
つまり、Claudeは、
- 関数の説明文(docstring)
- 引数の説明(Args)
を参照して、ユーザーのリクエストに対して最適な MCP サーバーの API を自動的に判別して使用しています。そのため、ドキュメントコメントは、明確で簡潔な記述 を心がけ、利用する際の意図を分かりやすく記載する必要があります。
もし複数のサーバーを用意した場合は、この説明文の内容がより具体的で明確であるほど、Claude が適切に機能を選択しやすくなります。
あとがき
この記事では、Claude for Desktop から MCP サーバーを利用する方法 を詳しく解説しました。
公式の Quickstart に基づき、環境の構築から、MCP サーバーの設定、Claude との連携までを順を追って説明しましたが、問題なく設定できたでしょうか?
MCP サーバーのセットアップは一見複雑に思えるかもしれませんが、手順通りに進めれば意外とスムーズに動作させることができます。特に、環境変数の設定や JSON の記述ミス には注意が必要です。もしエラーが出た場合は、設定ファイルのパスや記述を再確認し、Claude for Desktop を再起動してみてください。
今回の MCP サーバーは 天気情報を取得するシンプルな API でしたが、この仕組みを応用すれば、独自の機能を Claude に追加することも可能です。例えば、自作のデータベースと連携した情報検索、業務効率化のためのツール開発 など、さまざまな用途に活用できます。
今後、さらに MCP の機能を活用して、Claude と連携するカスタム AI ツールの開発 に挑戦してみるのも面白いかもしれませんね。この記事が MCP の導入の一助となれば幸いです。